Telnet is an application protocol used for two-way communication using terminal connection. This
article will help you to enable telnet client and server on
Windows 7 & 8 operating system.
- 1. Firstly open command prompt and type telnet command to make sure that it’s already installed or not on your system.

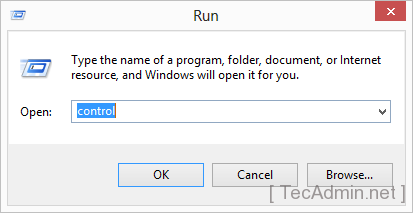
2. Open control panel on your system by type “control” on run window. You can also open control panel using windows navigation.
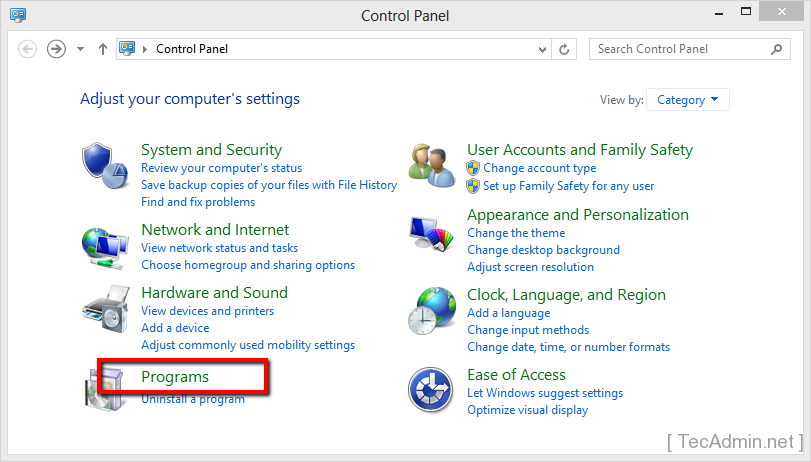
- 3. Now click on programs link in control panel as per below screen shot.

4. Now click on “Turn Windows feature on or off” under Programs and Features options.
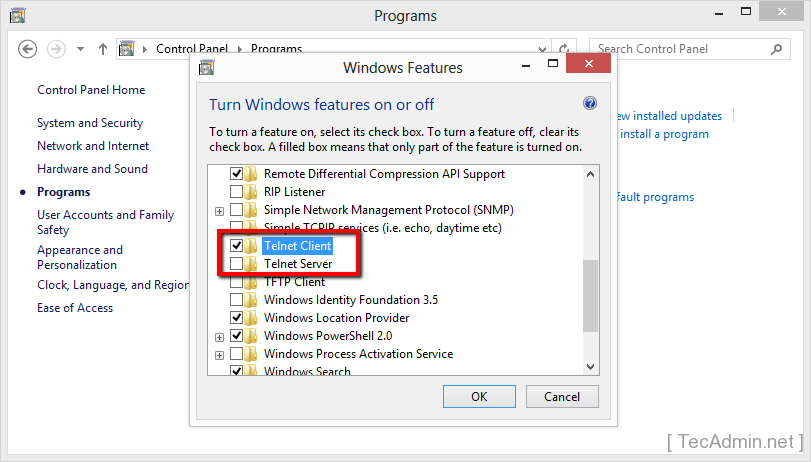
5. Now you will get Windows Features dialog box. Select Telnet Client check box as showing in below image. You can also select Telnet Server to enable telnet server on your Windows system.

Now click
OK.
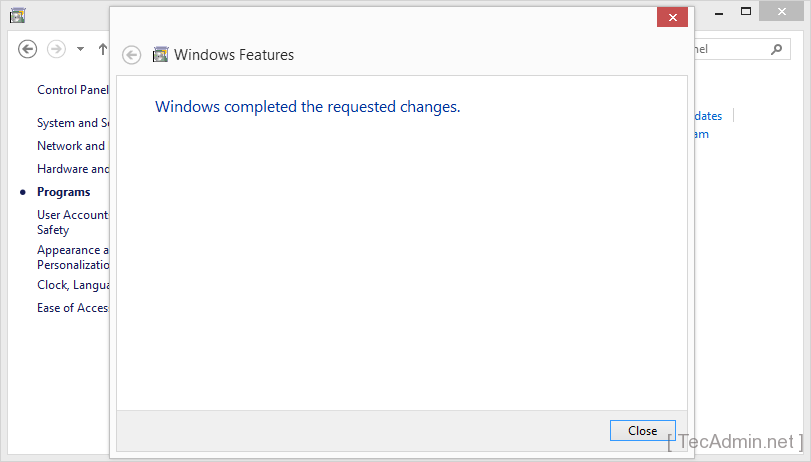
Installation processes will take few time and you will get result like below on successful installation.

6. As the telnet client has been installed on Windows system. Lets again type “
telnet” in command prompt and hit enter, You will get result like following.
 Source : http://tecadmin.net/


No comments:
Post a Comment